![]()
Transaction History
![]()
![]()
|
Transaction History |
|
|
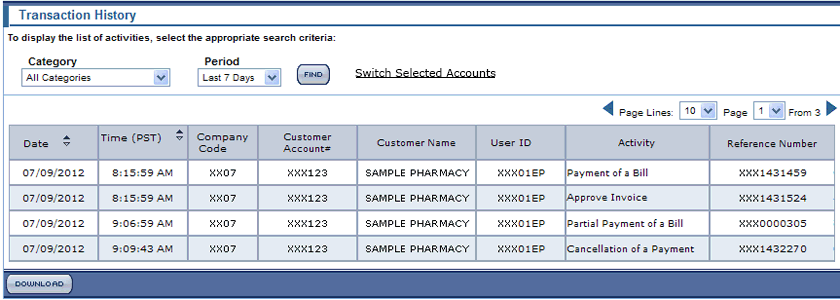
This TRANSACTIONS HISTORY screen allows you to review various activities occurring with your account. You can list and filter the items by category and time period. You can also download the data in Excel format.
How to use the TRANSACTION HISTORY screen:
Click on TRANSACTIONS in the Accounts Payable menu bar and select Transactions History from the sub menu that displays.
The TRANSACTION HISTORY screen displays. See an example below. You can mouse over the User ID to see the full name.
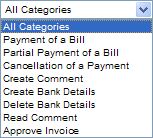
You can filter the items you want to display by category using the Category drop-down menu.
Select Last 7 Days, Last 30 Days, From/To, or Unlimited from the Period drop-down menu.
Click the Find button. The transaction history results will display per the criteria you selected.
- You can click the Switch Selected Accounts link at the top of the screen to make a new account selection or change your selected accounts. If you access the SWITCH SELECTED ACCOUNTS screen from any screen and make a new account selection, you will automatically be returned to that screen and see it refreshed with the new account selection made.
- You can download data by clicking the Download button at the bottom of the screen. A pop-up window will display, allowing you to either Open or Save the data to your local computer (in Excel format).
|